Luvakis Rhodesian Ridgebacks
  • About Us
  • Luvakis Rhodesian Ridgebacks
    • The Kidz at Luvakis
    • Show Kidz Elsewhere
    • Rainbow Bridge
    • Non-Ridgeback Kidz
    • RRCUS Awards & National Specialties
    • Luvakis Canine Good Citizens
    • Other Dog Fun
  • Planned Breedings
  • Current Litter
  • About Our Puppies
    • Waiting List Information
    • Luvakis Puppy Contract
    • How Much Is That Doggy In The Window?
    • Rewarding Your Efforts
    • What is Expected of Our Puppies
    • Puppies Go Home With...
    • Puppy Culture: Puppy Rearing Program
    • Available Adults
    • Sire Stats: Bro
    • Previous Litters >
      • Collins x Ricki Bobbi
      • Luke x Abby (1/4/24)
      • Mojo x Abby
      • Player x Ricki Bobbi
      • Mojo x Ricki Bobbi
      • Kanu x Kin-dah
      • Bro x Kin-dah (11/30/18)
      • Bro x Kin-dah (7/4/17)
      • Jake x Shirley
      • Zero x Shirley
      • Pierce x Nyekundu
      • Goose x Nyekundu
      • Pierce x Ekundu
      • Bowfield x Ekundu
      • Boomer x Ekundu
  • Information and Articles
    • Breed History
    • AKC Information
    • AKC Breed Standard
    • Important Links
    • Dog Stuff We Can't Live Without!
    • Recommended Readings
    • Finding the Right Breeder
    • One Puppy or Two?
    • Dogs and Kids (Reading Canine Body Language)
    • Tutorials: Ear Taping, Ear Wounds, Nail Dremeling >
      • Ear Taping
      • Ear Tip Wounds
      • Nail Dremeling
    • Collar Entrapment, Strangulation and CPCR Techniques Article
    • What Does Bloat (GDV) Look Like?
  • Contact Us

Ear Taping Tutorial
(Tape Bonnet)


Picture
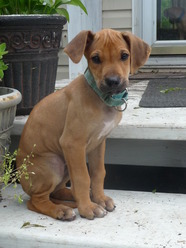
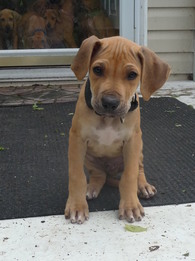
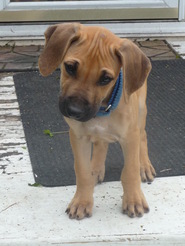
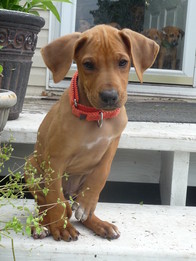
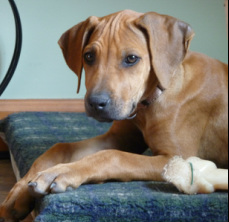
Both ears have gone wonky on this poor kiddo! (We call these wingnut ears or the "flying nun" look.) Ear taping will have these ears looking picture-perfect in no time!


This is meant to be a guide to ear taping. As young Ridgeback puppies go through major growth spurts, it is not uncommon for the ear leather and/or carriage to suddenly have a mind of its own. By taping the ears into proper position, we can help train the ears to remember where they belong. (Taping can be likened to the use of dental braces in people.)

Typically, we tape ears for 3-4 days, then remove the tape for several days to see how much the ears can "remember". If necessary, we repeat this cycle until the ear leather remains in proper position without assistance. 


1) Clean Ears- Clean both underside (skin side) and topside (fur side) with alcohol to remove debris and oil that would cause the tape not to stick well. Do not allow the alcohol to run into the ear canal as it can be an unpleasant sensation for the puppy.

2) Dry Ears- The alcohol will dry quickly on its own if you've not over-saturated the ear; otherwise, use some dry cotton or a paper towel to remove the excess alcohol.

3) Measure Ear- Before applying, we need to measure the tape length. Roughly eye the length of 1 ear, multiply times 2, then add ~1".

4) Apply Tape- Apply the tape to the underside (skin side) of the 1st ear, massage the tape several times to ensure good contact with the skin, then bring the tape under the jaw and apply to the underside of the 2nd ear, again massaging the tape to ensure good contact. When applying the tape, it should be applied closer to the front edge of the ear (the edge nearest the eye) than directly down the middle. This will allow the ear to fold down the center more naturally. (See Image 1, 4)

5) Check Positioning- When properly positioned, the ear tips should be the last point of contact on the tape. (See Image 2)

6) Apply Bridge- Lastly, cut a 3-4" piece of tape and apply to the outside (fur side) of the ear. This piece should be applied to the 1st piece of tape so as to cover the sticky gap between the ears, with the excess running up the fur-side of the ears (it is unnecessary for it to run all the way up to the top of the ear and mirror the length of the 1st piece of tape). Again, massage the tape, as you did the 1st, to ensure good contact with the fur. (See Image 3, 4)

7) Remove tape in 3-4 days' time to allow the ears to relax; reassess the need for re-taping in 3-5 days. Repeat as necessary. Check the ear canals and clean as necessary during this "relaxation" time. It is not uncommon for the ears to build-up waxy debris while taped.


Please Note: Some reddening of the skin from the tape is normal, as is some tape residue. The residue will come off with time or can be aided with a bath.


Picture


You will need:


Puppy With Rogue Ear(s)

Isopropyl Alcohol (Rubbing Alcohol)

Cotton Balls, Gauze Squares, Etc.

Tape (I prefer to use J&J 1" Zonas Porous tape for 
   older puppies and 1/2" tape for younger puppies.)

(Click any of the below images to enlarge.)
Image 1
Image 2
Image 3
Image 4
The tape should be applied to the leading       The tape should nearly connect the          The outside piece of tape doesn't need        Only leave ears taped for 1-2 days before
edge of the ear on both sides, not the              tips of both ear flaps.                                 to be very long, but it should cover over       taking them down for 1-2 days. Repeat
middle or further back portions of the ear.                                                                          exposed sticky portion of the first piece.       process as needed until done teething.


Examples of Rogue Ears

Picture
Right ear high ('terrier' ear), Left normal.
Picture
Right ear exhibiting an improper vertical fold, Left normal.
Picture
Right ear not folding properly, Left normal. These ears will probably correct without the aid of taping.
Picture
Right ear slightly high and out from head too much, Left also slightly high but will probably self-correct as ear gains weight with the growth of the tissues.


Taped Ears

Picture
Picture


Corrected Ears

Picture
Picture

Picture
Contact Us
Powered by Create your own unique website with customizable templates.